Create an Express Server with GraphQL
Note
I wrote the original article in spanish. So some references to resources and code are in spanish.
Prerequisites
To run and better understand the steps, it is necessary to have:
nodejsinstalled (and thereforenpmas well).
Project Creation
Creating a server with Express and GraphQL is relatively simple. To get started, navigate to the folder where you want to create the server. Open the console inside the folder, create a directory and navigate into it. In this case, the folder will be called express-gql.
$ mkdir express-gql
$ cd express-gql
Let's initialize the project with npm using npm init. Fill in the requested options.
$ npm initThen complete the options. If you don't enter anything, the default value will be automatically selected. You can replace <author-name> with your name.
This utility will walk you through creating a package.json file.
It only covers the most common items, and tries to guess sensible defaults.

See `npm help json` for definitive documentation on these fields
and exactly what they do.

Use `npm install <pkg>` afterwards to install a package and
save it as a dependency in the package.json file.

Press ^C at any time to quit.
package name: (express-gql)
version: (1.0.0)
description: A server with graphql
entry point: (index.js)
test command:
git repository:
keywords:
author: <author-name>
license: (ISC) MIT
About to write to /<...path-to-folder>/express-gql/package.json:

{
  "name": "express-gql",
  "version": "1.0.0",
  "description": "A server with graphql",
  "main": "index.js",
  "scripts": {
    "test": "echo \"Error: no test specified\" && exit 1"
  },
  "author": "<author-name>",
  "license": "MIT"
}


Is this OK? (yes) yes
After this, install the required dependencies with the following command:
$ npm install --save express graphql express-graphqlOnce the dependencies are installed, create the main file we will use, named index.js.
Open the index.js file in your preferred text editor.
We will now write and explain the code.
First, import the needed packages.
const express = require('express');
const expressGraphQL = require('express-graphql');
const { buildSchema } = require('graphql');
Next, create a schema. A schema in GraphQL is where we define what type of action can be performed (e.g. Query, Mutation), its name, and the data type it returns. Additionally, we can define new data types.
Query is used to fetch information and Mutation to modify it.
Let's create three Query, one Mutation, and a new data type.
// graphql schema
const schema = buildSchema(`
  type Query {
    mensaje: String
    persona(id: Int!): Persona
    personas(edad: Int!): [Persona]
  },
  type Mutation {
    actualizarEdad(id: Int!, edad: Int!): Persona
  },
  type Persona {
    id: Int,
    nombre: String,
    apellido: String,
    edad: Int,
    hobbies: [String]
  }
`);
We define three Query: mensaje, persona, and personas. Both persona and personas require parameters. We use ! after the data type to specify that it is a required parameter. persona returns an object of type Persona and personas returns an array of Persona objects.
We also define a mutation called actualizarEdad that receives two parameters of type Int and returns a Persona object.
Finally, we define a new data type called Persona, which contains the properties id, nombre, apellido, edad, and hobbies. hobbies is defined as [String], so it can contain an array of strings.
Since we are not using a database in this guide, let's create a .json file to store the information we will manipulate. Create a new file called personas.json.
Add the following information to the file:
[
  {
    "id": 1,
    "nombre": "Carlos",
    "apellido": "Rodriguez",
    "edad": 21,
    "hobbies": ["programar", "cantar", "cine", "dibujar"]
  },
  {
    "id": 2,
    "nombre": "Jesus",
    "apellido": "Medina",
    "edad": 23,
    "hobbies": ["cocinar", "música", "cine", "salir"]
  },
  {
    "id": 3,
    "nombre": "Karla",
    "apellido": "Araúz",
    "edad": 18,
    "hobbies": ["dibujar", "cocinar", "salir"]
  },
  {
    "id": 4,
    "nombre": "Marcos",
    "apellido": "Navarro",
    "edad": 25,
    "hobbies": ["programar", "musica"]
  },
  {
    "id": 5,
    "nombre": "Jose",
    "apellido": "Mendoza",
    "edad": 18,
    "hobbies": ["editar videos", "cantar", "tocar guitarra"]
  }
]
Now bring the file into our index.js. The code would look like this:
const express = require('express');
const expressGraphQL = require('express-graphql');
const { buildSchema } = require('graphql');
// new line
let personas = require('./personas.json');
Now tell the GraphQL API how to fetch the information defined in the schema. To do this, we will create functions that manipulate the personas object array that we required earlier. It's important to note that modifications made to the data at runtime will not modify the actual personas.json file, since we are using a temporary variable to require the file.
Here is the code with the functions that will be applied to our schema. When a GraphQL query is made, an object of arguments is received. These arguments are the parameters sent with the query. I will be using object destructuring to directly use the properties when creating the function. More information here.
// for queries
const getMensaje = () => 'Hola desde el servidor con graphql';
const getPersona = ({ id }) =>
  personas.filter(persona => persona.id === id)[0] || [];
const getPersonas = ({ edad }) =>
  personas.filter(persona => persona.edad === edad);
// for mutation
const actualizarEdad = ({ id, edad }) => {
  personas.map(persona => {
    if (persona.id === id) {
      persona.edad = edad;
    }
    return persona;
  });
  return getPersona({ id });
};
express-graphql receives an object with a property called rootValue. The rootValue takes an object with the same names defined in the schema and how these queries will be processed.
Let's create an object called root and pass it the created functions:
const root = {
  mensaje: getMensaje,
  persona: getPersona,
  personas: getPersonas,
  actualizarEdad: actualizarEdad
};
Finally, let's create the Express server with the /graphql endpoint handled by expressGraphQL:
// create express server with graphql at /graphql endpoint
const app = express();
const port = 4000;
app.use('/graphql', expressGraphQL({
  schema: schema,
  rootValue: root,
  graphiql: true
}));

app.listen(port, () => console.log(`Servidor graphql corriendo en http://localhost:${port}/graphql`));
The index.js file should look like this:
const express = require('express');
const expressGraphQL = require('express-graphql');
const { buildSchema } = require('graphql');
let personas = require('./personas.json');

// graphql schema
const schema = buildSchema(`
  type Query {
    mensaje: String
    persona(id: Int!): Persona
    personas(edad: Int!): [Persona]
  },
  type Mutation {
	  actualizarEdad(id: Int!, edad: Int!): Persona
  },
  type Persona {
    id: Int,
    nombre: String,
    apellido: String,
    edad: Int,
    hobbies: [String]
  }
`);

// for queries
const getMensaje = () => 'Hola desde el servidor con graphql';
const getPersona = ({ id }) =>
  personas.filter(persona => persona.id === id)[0] || [];
const getPersonas = ({ edad }) =>
  personas.filter(persona => persona.edad === edad);
// for mutation
const actualizarEdad = ({ id, edad }) => {
  personas.map(persona => {
    if (persona.id === id) {
      persona.edad = edad;
    }
    return persona;
  });
  return getPersona({ id });
};

const root = {
  mensaje: getMensaje,
  persona: getPersona,
  personas: getPersonas,
  actualizarEdad: actualizarEdad
};

// create express server with graphql at /graphql endpoint
const app = express();
const port = 4000;
app.use('/graphql', expressGraphQL({
  schema: schema,
  rootValue: root,
  graphiql: true
}));

app.listen(port, () => console.log(`Servidor graphql corriendo en http://localhost:${port}/graphql`));
Execution
To run our server execute the following command in the console within the project:
$ node index.jsWhen navigating to http://localhost:4000/graphql, you should see the following page:
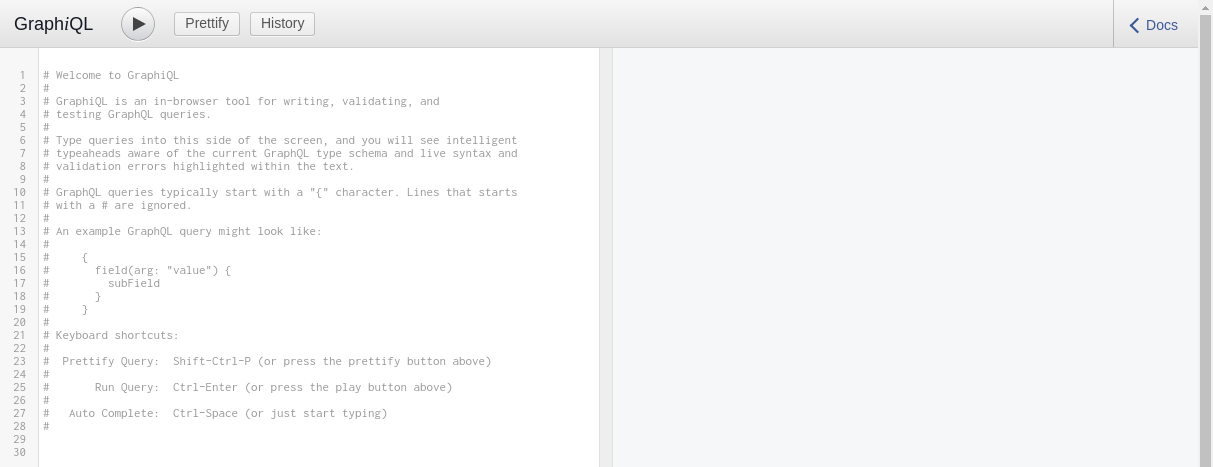
We have access to a graphical panel to interact with our API since we set graphiql: true when creating the endpoint.
Testing with GraphiQL
If we put { mensaje } on the right side, the API should show the following result:
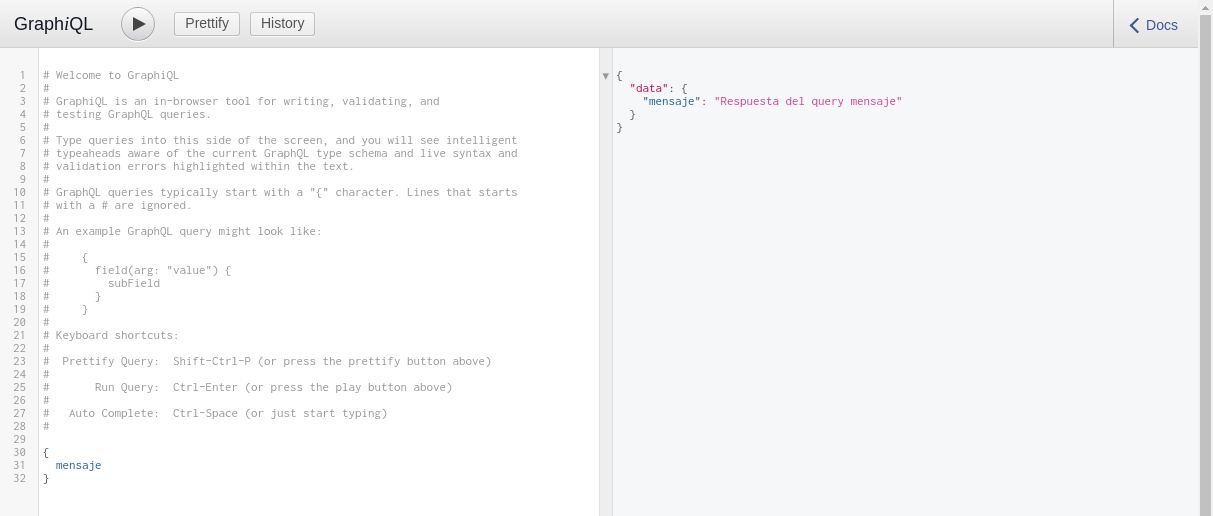
We can also pass parameters to our query. For example, we can fetch persona with id: 1 and specify which properties we want to obtain as follows:
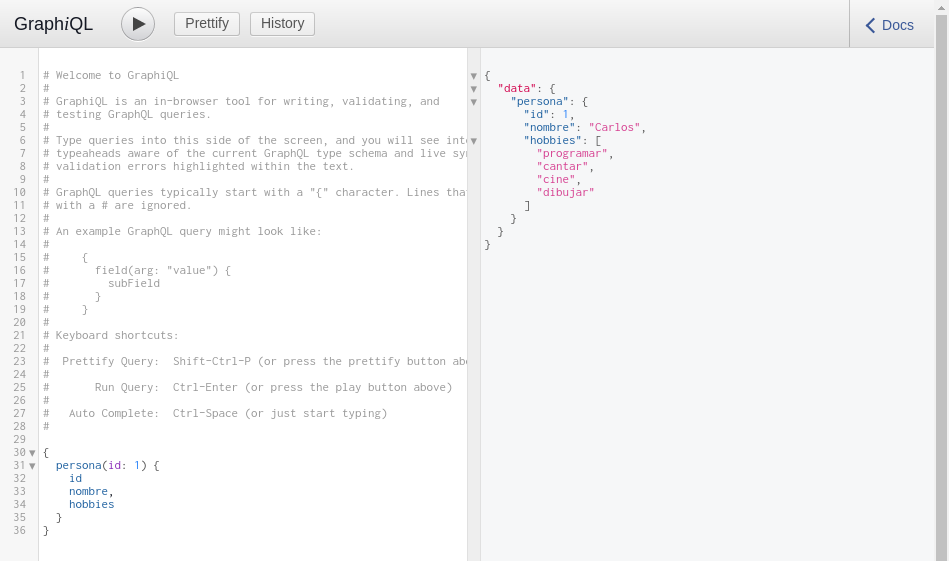
We see that we are only showing the id, nombre, and hobbies properties.
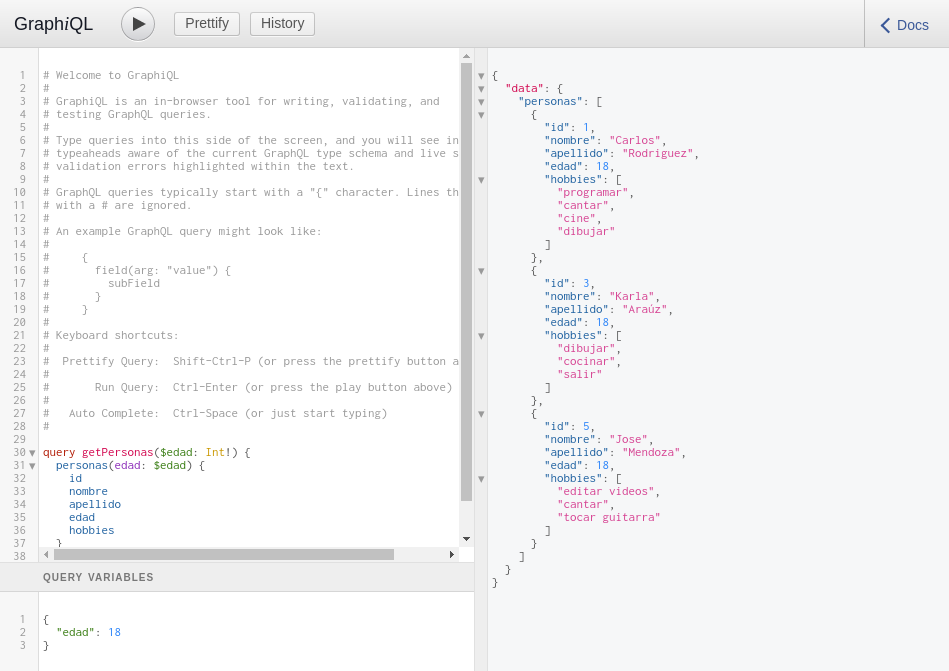
We can also use the Query we created called personas that receives an age.
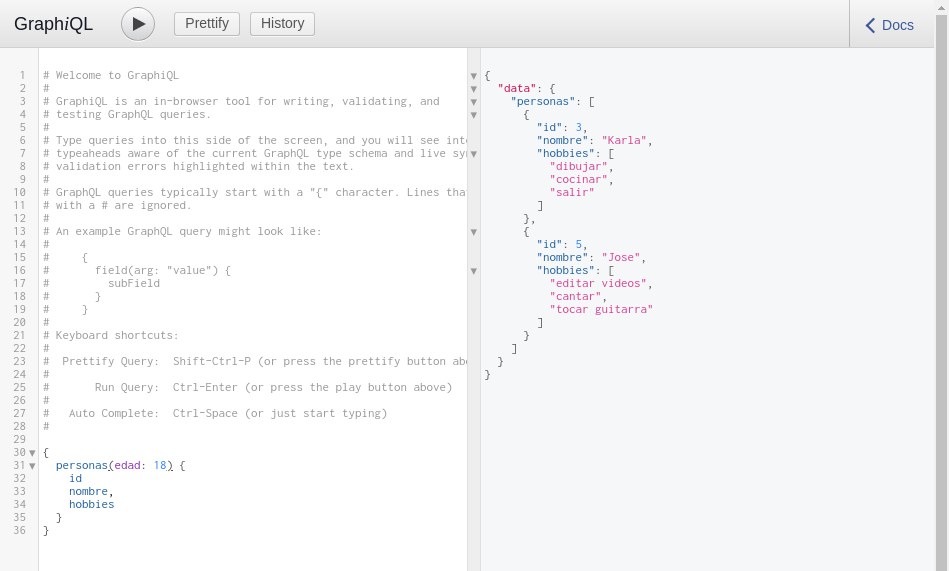
To execute a mutation we must first define it as such. In this case, we define a mutation called actualizarEdad and specify that it must have id and edad of type Int. We will see that after executing the mutation, the function we defined returns the object where the modified age information can be seen.
Now let's change Carlos's age from 21 to 18 by executing the mutation we created:
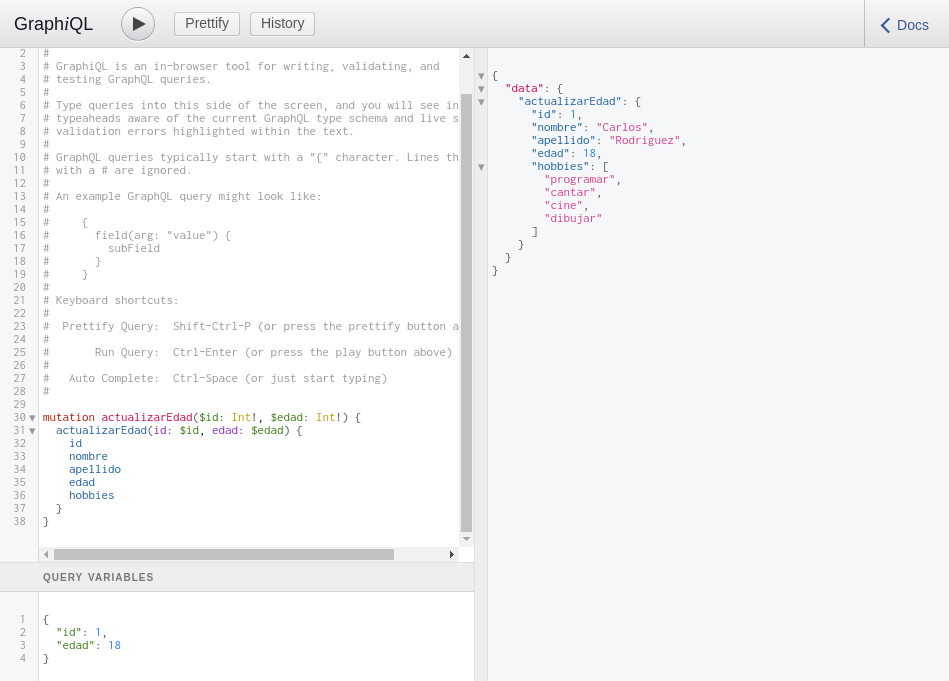
It should be noted that since we defined a mutation with variables $id and $edad, it is necessary to define them in the bottom part where it says Query Variables.
If we query the personas query again with age 18, we will see that now Carlos appears in the list:
Conclusions
With these examples, we see that GraphQL provides us with a graphical environment where we can test our schemas and processes. Specifically, in our case, we were able to employ various GraphQL concepts such as schemas, methods that resolve them, and their configuration on an Express server.
I hope this guide is helpful to you. Cheers!

